Broccoli-Cheese Soup

Good afternoon, everyone! I’m so sorry for my recent absence. It’s been extremely busy for us in the Champagne household. I’ve been helping family move, reading through submissions, dealing with teacher meetings, school concerts, shopping trips, colds, the list could go on.

Luckily, all of the colds and flus have forced me to practice making soup! I believe I’ve perfected the Broccoli-Cheese. This recipe requires a strong blender; I’ve got a Viamix.

These measurements all depend on how much soup you wish to make. I have a family of 6, so I often make two full batches, and we always have leftovers.

The ingredients:

– 1 head of broccoli
– 2 cups chunked cheese (I use marbled cheddar)
– 1 tsp powdered chicken bouillon base
– Sprinkle of seasoning salt and pepper (to taste)
– 2 cups milk
– 1 cup water
(The milk and water portions depend on how thick or watery you want your soup, in addition to what can fit in your blender)

IMG_7262

Directions:

  1. Chop broccoli and put in steamer.

IMG_7259

2. Chop cheese into chunks (whichever manageable size is recommended for your blender).

IMG_7261

3. Add cheese chunks and spices to blender.
4. Remove broccoli from steamer (once softened) and put it in blender.

IMG_7263

5. Add milk and water to blender.

IMG_7264

6. Blend at full power. With the Vitamix blender, leave it running for 7 minutes. The Vitamix blender heats the soup for you, so once the time is up, your soup will be hot enough to pour directly into bowls. If your blender doesn’t do this, then blend to your preferred consistency and heat in a pot on the stove.

IMG_7267

IMG_7268

7. Serve. I like to grate some extra cheese and put it on top of the soup.

IMG_7271

This soup is a hit with our family. The kids like to put Saltine crackers in it (like they do tomato soup). If you have no Saltines, the goldfish crackers work well, also.

Thank you so much for reading! I hope you all have a lovely holiday season! Happy Tuesday!


What I’ve Been Up To: Part One: The Food

Good afternoon, everyone! It’s been quite some time since I’ve written. Sorry about that. I’ve kept myself busy trying new recipes, working on my crocheting in the evenings, writing, and taking care of my four children. This blog is about five of the new recipes I’ve explored.

First up is the Roasted Cauliflower. This is the recipe I followed:

Ingredients:

– 1 head cauliflower
– 2-3 cloves garlic (minced/crushed)
– 2 tbsp olive oil
– Salt and Pepper
– I added a dash of parsley

IMG_3854

Directions:

*Note: The recipe called for a ziplock bag to mix it all together, but I used a bowl.

1. Preheat oven to 375 degrees F.

2. Wash & thoroughly dry cauliflower.

3. Chop cauliflower.

4. Mince garlic,

5. This is where the recipe I followed said to put ingredients in a ziplock bag and mix. I just put it in a bowl and mixed it all together until the cauliflower was coated.

IMG_3856

6. Spread on baking sheet and put it in the oven for “30 minutes”. I had to put mine for much longer. Closer to 45 minutes. I also turned the heat to 400.

IMG_3857 IMG_3858

The recipe I followed said to wait until the cauliflower started going brown. I did this, but it was still wilted and squishy.

IMG_3859

My final thoughts on the Roasted Cauliflower: This was tasty, but not really worth the trouble. I would be just as happy with flavoured steamed cauliflower, plus it would take less time and effort.

Recipe number two: Egg fried rice.

I genuinely had no clue what I was doing here. I’d never cooked rice before in my life. I followed the directions on the bag, but again, I really didn’t know what I was doing.

Ingredients:

– Rice
– Eggs
– Corn (I didn’t have any peas, which is what my husband uses when he makes it)
– Soy sauce

Directions:

1. Cook rice according to package. (I didn’t keep stirring, so the bottom burned on mine)

IMG_3832 IMG_3835

2. Cook eggs a-la scrambled eggs.

3. I was really confused here, so I just mixed all of my ingredients together in the skillet.

IMG_3834

4. Serve.

IMG_3838

Final thoughts: I’m a huge fan of egg fried rice, I’ve just never made it before. And while I was completely confused with what I was doing, it turned out very tasty.

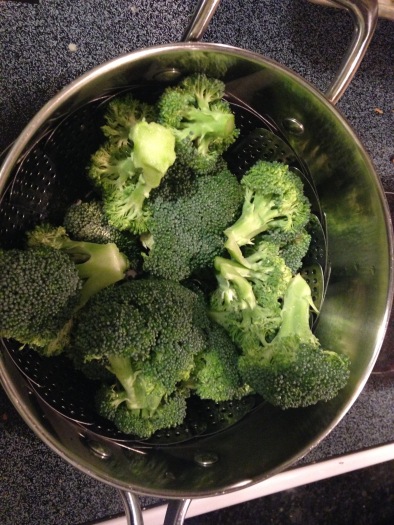
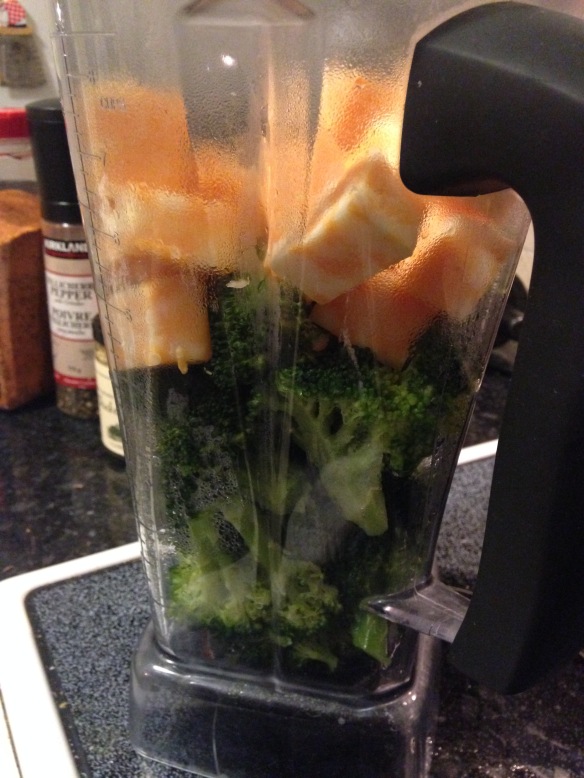
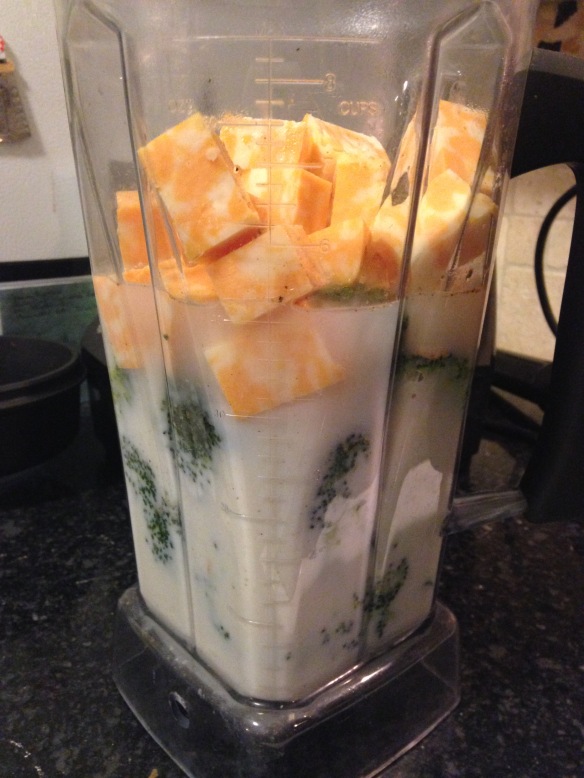
Recipe number three: Broccoli-tofu mock stir fry.

Ingredients:

– 1 head broccoli
– 1 small brick of tofu
– Soy sauce
– Water
– Unsalted butter
– Sesame seeds would be really good with this, but I didn’t have any

Directions:

1. Chop broccoli and tofu (into whichever shape suits you).

2. In skillet, melt a small chunk of butter.

3. Add soy sauce to skillet.

4. Immediately add chopped tofu and broccoli.

5. Stir constantly until broccoli has softened and all food is coated with soy sauce.

6. Add soy sauce and small amounts of water throughout cooking.

7. Serve and enjoy.

IMG_3865

Final thoughts: I love this one. I have been making this for my lunches during the day at home. Yum!

Recipe number four: Cod dinner. This is the recipe I followed:

– Cod (they called for “white fish”)
– 4 tbsp softened butter (I used unsalted)
– 2 tbsp fish spice of your choice (I used salt and pepper)
– lemon juice (recipe called for 2 halved lemons)

For the lemon-garlic butter:

– 1.5 cups unsalted butter
– 4 garlic cloves, crushed
– lemon juice (they called for the juice of 2 lemons)
– 2 tbsp cream
– freshly ground black pepper
– chopped parsley (I keep chopped parsley in my freezer for my cooking)

– capers, to serve

Directions:

1. Preheat oven to 425 degrees F (recipe had the heat in celsius, which threw me off. Accidentally put it in at the wrong temp. Oops!)

2. Place the fish in an oiled “roasting tray” (I had to google this, because, let’s face it, I’m not the greatest cook and clearly not practiced enough to know what this was. I ended up using a casserole dish).

3. Rub the softened butter all over the fish. Sprinkle with salt and pepper and cover with foil.

4. Place in the oven and allow to bake for around 15 minutes (mine was in for longer), then remove the foil and cook for another 5-10 minutes. I kept checking after 5 minutes.

IMG_3862

5. While the fish is cooking, melt the butter, garlic, and lemon juice together in a small saucepan. Add cream in and mix well.

IMG_3861

6. Add parsley and pepper to taste.

7. Serve the fish with lemon-garlic butter sauce and top with capers.

IMG_3864

Final thoughts: While the fish ended up looking like it had been squished between my toddlers’  fingers, this meal was absolutely delicious. I will definitely make this again. We also kept the leftover sauce and used it for our prawns the next night. It also tastes great over broccoli and asparagus.

Recipe number five (the final one): Baked eggs in avocado. This is the recipe I followed:

Ingredients:

– 1 avocado (I used two)
– 2 eggs (I used three)

Directions:

1. Slice the avocado in half and remove the pit.

2. Scoop out the inside of the avocado, leaving a rim of meat around the edges and bottom.

3. Crack an egg into each half of the avocado.

IMG_3868

4. Sprinkle with salt and pepper and place in the oven at 425 degrees F for about 15 minutes.

IMG_3870 IMG_3872

5. Serve.

Final thoughts: This might be good to some people, but it just didn’t work for my husband and I. I’ve never eaten a cooked avocado before, and I’ve got to say that I really didn’t like it. I would have much preferred to cook myself an egg and have sliced avocado on the side.

So there you have it. A brief look at the last two weeks of dinners in our house. Not all of them were great, but I learned some good lessons.

Thank you so much for reading!

Potato Patty Mistake

Hello blog readers! It has been some time since I’ve written a blog about food, so I thought I would share with you a big blunder I’d made a few days ago.

On New Year’s Eve, my husband and I (mostly my husband) made a special meal of steak, lobster, asparagus, and mashed potatoes. It was delicious! We did, however, have plenty of leftover mashed potatoes (as is with most meals that includes this particular side dish).

A day or two after the New Year dawned, I decided to do something with the mashed potatoes. I had thought I’d seen an idea for potato patties somewhere on Pinterest, and I – foolishly – thought I could make them on my own without a recipe or any reference guide whatsoever. Yes. Foolish.

Alas, this is my attempt at potato patties.

Ingredients:

– Leftover mashed potatoes
– Butter/margarine (salted or unsalted, the choice is yours)

IMG_3735

The directions I created:

1. Heat pan and put a chunk of butter in.

2. Once butter has melted and is bubbling, scoop mashed potato leftovers into pan with ice-cream scooper. Flatten with “flipper”.

IMG_3736 IMG_3738

3. Wait for a few minutes… or until you’re able to slide the flipper beneath the patty without it all falling apart. This is very difficult.

4. Flip patties and cook other side.

IMG_3740 IMG_3745

5. Serve.

IMG_3744 IMG_3746

Final thoughts: In retrospect, I think the potatoes should be on the dry side and possibly thicker. We like our mashed potatoes to be chunky yet moist, so we add a lot of butter in when we’re making it. My thought is that if the potatoes are thicker and dryer, it’d be easier to flip them. I also think that adding flavour wouldn’t be amiss. These just tasted like our mashed potatoes. Nothing special. Honestly, I might as well have simply put the leftovers in the microwave and had them like that. This was a complete waste of time.

Thank you for reading! Hope you’re all having a great New Year!

The Lettuce Wrap

Good morning, blog readers! Guess what? I actually cooked a dinner this week! Yes, amid my very busy schedule of late, I finally managed to make a meal. It was delicious!

At our house, we love lettuce wraps. I didn’t even have to search for a recipe on Pinterest, because this one is already a family favourite.

Ingredients:

– 1 head lettuce
– 2 cloves garlic, very finely minced
– 2 packages of lean ground turkey meat (or beef, if that is your preference)
– Hoisin sauce
– Soy sauce
– Ginger (peeled and minced from chunk no larger than the pad of your thumb)
– 2-4 large carrots
*Note: This recipe is also very good if you add chopped water chestnuts – we just didn’t have any)

IMG_3198 IMG_3199

Directions: (for the crockpot – I will write about doing it in a pan instead at the end)

1. Lightly coat the bottom of the crockpot with sauce (both a dab of hoisin and some soy sauce).

2. Put ground meat into the crock pot. Mine was partially frozen still, but thawed would be better.

IMG_3200

3. Top the meat with dribble of sauce.

IMG_3201 IMG_3202

4. Add ginger (I used a chunk no larger than the pad of my thumb, peeled it, and used my special mincer to mince it) and garlic.

IMG_3203

5. Put crockpot on high for several hours (could be 5 or 6, even longer, depending on when the meat is cooked). I opened my crockpot up several times throughout the day and “chunked” up the ground meat, though I suppose this could be done at the end.

IMG_3208

6. I added more sauce throughout the cooking process and also scooped out some of the liquid from the thawed meat after it had been cooked. When you know the meat is done, have a taste of the mixture to make sure the spices are to your liking. Add more soy or hoisin if needed.

7. Once it has been cooked, clean a head of lettuce and peel off the layers, trying to keep each layer in tact to create little lettuce bowls.

IMG_3212

8. Peel and shred 2-4 carrots (I peeled four in the photo, but only grated 3).

IMG_3206 IMG_3210

9. Add carrots and mix.

IMG_3213

IMG_3214

10. Serve. I put the meat in a large bowl and place in the centre of the table with a serving spoon. Each person can take a “bowl” of lettuce and fill with meat mixture.

IMG_3215

**How to cook this in a pan:

Mix all ingredients (except carrots) in a deep pan and cook until meat is done. Add carrots at the end and serve.

*Note: This can get really messy, so I would eat over a plate or bowl.

IMG_3218

This is a delicious meal that my husband and kids love. I like my crockpot version, but it is faster in the pan. Over all a favourite in our house!

IMG_3216_2 IMG_3217

Enjoy and thank you for reading!

The Delicious Second Attempt at Enchiladas

Good morning, everyone! Today I’m writing about my second attempt at enchiladas. I changed a few things in the recipe, and it definitely worked out for the better. The problem I have with blogging it today is that my husband helped by making his own enchilada sauce (instead of my strained salsa idea from my last attempt), but after he’d gathered all the ingredients, his iPad battery died and he couldn’t find the recipe on Pinterest again… so he had to wing it.

I followed my previous recipe.

– 1 roasted chicken, carved and chopped
– 1 rice package (I used Uncle Ben’s Bistro Express Tomato and Herb flavour – different from last time, and much more flavourful) (prepared)
– 1/3 brick of cream cheese
– 2 tablespoons sour cream
– A bunch of shredded cheese (I used aged Cheddar)
– 2 tablespoons lime juice
– 1/4 teaspoon cumin
– Salt to taste
– 1 package flour tortillas
– 1/3 cup heavy whipping cream
– Enchilada sauce (Hubby made this from scratch – Photos included below)
IMG_2831 IMG_2832
This is what Hubby did: I genuinely don’t know in what order he added his ingredients, but I know he cursed this recipe several times while mixing them. I’m sure it would have been easier had his iPad battery not died, causing him to lose the recipe and directions. It turned out delicious, though. We’ve got a container of it stored in the freezer for another enchilada night!
The ingredients he used:
– Salt
– Pepper
– Cumin
– Chicken broth
– Olive oil
– Garlic
– Brown sugar
– Diced tomatoes
– Tomato paste
– Oregano
– Paprika
– Chili powder
– Some other spices that I can’t read from the picture… sorry!
IMG_2825 IMG_2826 IMG_2827 IMG_2828 IMG_2830
The directions I followed:
1. Prepare the rice (I just followed the directions on the outside of the package.)
2. Combine chicken, rice, shredded cheese (half of the amount you’ve shredded), sour cream, cream cheese, cumin, lime juice, & salt, in large bowl.
IMG_2833 IMG_2834
3. Put the mixture in tortillas.
IMG_2836
4. Roll, and put in a deep baking pan.
IMG_2835 IMG_2837
5. Pour enchilada sauce over tortillas.
IMG_2838 IMG_2839
6. Pour whipping cream over the enchilada sauce.
IMG_2840
7. Sprinkle the rest of the shredded cheese on top.
IMG_2841
8. Loosely cover with aluminum foil.
IMG_2843
9. Bake at 350 for 35 minutes. Remove the foil and keep in if you want your cheese to keep cooking. I did, so I put it in for another 10 minutes.
IMG_2844 IMG_2845
This is the end result: Serve and enjoy!
IMG_2846 IMG_2847
This one was a vast improvement from my previous attempt. It was so good, we each had seconds. Hubby took some to work for lunch and I had my left-overs for breakfast. I know… don’t judge. It was just that good.
I honestly can’t wait to make more. Once I find out the directions for Hubby’s enchilada sauce, I’ll let you know.
Thank you for reading!

The Left-Over Turkey Sandwich

One of my favourite things about turkey or chicken left-overs is what I can make with them.

In my opinion, the very best thing (and the most delicious) to make are turkey sandwiches. They are also very easy to make.

Ingredients:

– Left-over turkey or chicken
– Gravy (left over from the turkey or freshly made from the chicken)
– Bread
– Salt
– Pepper
– Margarine/butter

Directions:

1. Slice/separate small pieces of turkey

2. Toast bread then butter.

3. Put turkey on buttered bread and add salt and pepper.

IMG_2537

4. Close sandwich and top with hot gravy.

IMG_2538 IMG_2539

5. Eat with a knife and fork. Enjoy!

Thank you all for reading!

Tomato Soup – Attempt #2

Good evening blog readers! Today I’m writing about my second attempt at tomato soup. It was better than the last one… but not by much. My husband says he loved it, but I think he’s just flattering me.

I found the recipe on Pinterest, but it is a different one than the last one I used.

This is the recipe I followed:

– 7 vine tomatoes
– 2-3 cloves of garlic
– 1-2 tablespoons olive oil
– Pinch of salt (to taste)
– Pinch of pepper (to taste)
– Chicken broth (recipe called for 2 cups, but I accidentally put in the whole container… which was about 4 cups)
– 1 cup cream
– 1 can tomato paste (I added this because I had to compensate for putting in too much broth)

Directions:

1. Mince garlic and put in saucepan with olive oil, salt, and pepper on low heat.

IMG_2586 IMG_2587

2. Chop tomatoes (I make sure to take out the stem area – as pictured below) and add it to the garlic and olive oil (be sure to retain the tomato juices). *Note: I made the mistake of putting the tomatoes into their own pot as I misunderstood the directions on the blog I followed. I ended up adding the garlic mixture on top of the tomatoes – which is probably why it ended up still tasting a lot like garlic.

IMG_2588 IMG_2589 IMG_2591

IMG_2592

3. Let the tomatoes, garlic, and olive oil mixture simmer on medium for 15 minutes.

IMG_2593

IMG_2594

4. Add in chicken broth.

IMG_2595

5. Let it cool for a few minutes before you put everything in the blender.

IMG_2596 IMG_2597

6. Blend until smooth.

IMG_2598

7. Return to stove and add cream.

IMG_2599

8. At this point, we added in the tomato paste and I used the whisk to stir it in.

IMG_2600 IMG_2602

9. Add salt, pepper, or any other flavours of your choice.

IMG_2604

10. Eat it on its own or enjoy with a grilled cheese!

IMG_2605 IMG_2606 IMG_2607

Enjoy and thank you for reading!

The Perogie Casserole, with Turkey

Good morning, blog readers!

Today I’m writing about a new discovery of mine. The Perogie Casserole. In this case, I used our turkey leftovers in it, but ordinarily I do not.

I found this particular recipe on the back of the perogie package, but I’ve added little differences.

The ingredients:

– Perogies (we use frozen)
– 2 cans of Cream of Potato soup
– Broccoli (we often use carrots here; sometimes both)
– Cheese – shredded (the variety is your choice. In this case we used white cheddar)
– Leftover turkey meat (you could use chicken or if you want, no meat at all)
– Tomatoes (larger tomatoes chopped, or small tomatoes)

IMG_2545

Directions: (preheat oven to 360 degrees F)

1. Open can of soup and put into bottom of casserole dish.

2. Mix in 1/2 can of water and stir.

IMG_2547

3. Add chopped turkey over soup.

IMG_2549

4. Chop vegetables and add 1/2 over turkey.

IMG_2550

5. Cover with perogies.

IMG_2551

6. Add remainder of veggies over perogies.

7. Add the other can of soup on top and “smooth” over with the back of a spoon so that the surfaces are covered.

IMG_2552

8. Top with shredded cheese.

IMG_2553

9. Put it in the oven at 360 degrees F for 25 minutes. I usually watch it after the 25 minute mark to check its progress. Sometimes it isn’t quite ready. Wait until the cheese is golden brown or bubbly. Remove from oven.

IMG_2555

10. Scoop out and serve, topped with chopped tomatoes.

IMG_2556

Thank you all for reading! Have a great weekend!

The Cheddar Biscuits – Thanksgiving Dinner (Part 3 of 4)

Good morning, everyone! This morning I’m writing about the white cheddar biscuits that we added to our Thanksgiving dinner.

This is the recipe we used: (I doubled the original recipe)

– 4 cups flour
– 2 tbsp baking powder
– 1 tsp salt
– 2 cups cream
– Cheddar cheese
– 1 cup butter

(Note: we omitted the “chives” from the original recipe.)

IMG_2447

*Note: In the photo above, I had already added the salt and baking powder to the flour mixture.

The steps:

1. Mix the flour with baking powder and salt. (The original recipe said to sift it together, but my husband said it was unnecessary.)

2. Cut in butter until it resembles coarse meal. Now, I had no idea what this meant, but thankfully my husband was around to answer my questions.

IMG_2449 IMG_2450

I genuinely had no idea what I was doing or what this portion of my baking should look like. My husband said that I should do it quickly because you don’t want the butter to soften. He helped me quite a bit… I’m sure they wouldn’t have turned out as well as they did if he hadn’t been there to help me!

3. Add cheese.

4. Add cream.

IMG_2451

5. Mix quickly with fork until dough “comes together”. Again, I didn’t know what this meant. I couldn’t figure out why my dough was so crumbly and lumpy, so I kept mixing. Until my husband came in and saw what I was doing and took over.

IMG_2452

6. Using your hands, gently put the ingredients together. I think you can safely assume that  I continued to have no idea what I was doing. Hubby moved immediately to the next step.

7. We dumped the mixture onto our counter and Hubby patted it down until it was about 1/2 an inch to 3/4 of an inch thick.

IMG_2453 IMG_2454

8. Use circular cutter (we used a cup/glass) to cut the dough into circles.

IMG_2455 IMG_2457

9. Put cut-out biscuits onto parchment paper lined cookie sheet.

IMG_2456 IMG_2458

IMG_2467

10. Bake for 12-15 minutes at 450 degrees F. *Note: keep an eye on them after the 15 minute mark if, like us, yours aren’t quite done. We watched until our white cheddar had darkened and then we removed them.

IMG_2480 IMG_2487

These cheese biscuits were delicious. Seriously delicious. The family we had over for thanksgiving dinner took seconds, thirds, even fourths of these. They’re great for sopping up gravy!

*Leftover biscuit recipe idea: A day or two after Thanksgiving, we still and a few (6 or so) biscuits left over in the fridge. With these, we (*ahem* I mean, my husband) made mini pizzas. Put homemade pizza sauce directly on top of the biscuit, added a thin slice of Hungarian Salami and topped it with shredded cheese and put it in the oven. So good! I desperately wanted more, but there weren’t any left. The kids loved it, too.

I hope you enjoy these as much as we did!

Thank you for reading!

Our Weekly Salad

Hi Everyone! I’m sorry I’ve been absent for a few days, I’ve been wildly busy with work (writing/editing) that I haven’t had time to be creative with meals. This blog post is about another of our weekly meals – the salad. This is our longest-running favourite meal and the recipe for the dressing has been in my family for generations.

Rest assured, my lovely readers, Hubby and I will be attempting to make a turkey dinner today and it will most definitely be blogged. The last time I tried to make one, the turkey ended up being raw… so this should be interesting.

OK! Here we go. Our weekly salad.

These are the salad ingredients:

IMG_2363

– 3-4 vine tomatoes (I only had two here so I added some cherry tomatoes)
– 1 or 2 handfuls of spinach (we didn’t have enough left for our usual salad, so I just used what was left)
– Kalamata Olives (to taste – we usually put in 10 or so)
– Feta cheese
– 1 yellow pepper
– 1 cucumber

The steps: – Use a large bowl for the salad.

1. Peel and cut the cucumber.

IMG_2364

One would think that I would know what to do and what not to do in my own recipe, but apparently we all have “those days”. I ordinarily have a bowl for peels, cuttings, etc. when I make my salads, and in this case, I ended up putting the yellow pepper top into my salad… I realized what I’d done and I took a picture. So here, readers and friends, enjoy my foible.

IMG_2365

2. Clean and chop yellow peppers.

IMG_2366

3. Slice tomatoes. *Note: In the pieces that are predominantly seeds (or they’re just hanging there), I squish out the seeds. I find that the tomato “goop” or “innards” make the salad watery. Plus (from what I’ve heard) tomato seeds aren’t good for certain bloodtypes. So there you have it. I take the seeds out.

IMG_2367 IMG_2368

4. Pit and slice olives. (Unfortunately, it turned out that our olives had been contaminated and had gotten mouldy. So we didn’t use them this time.) The picture below is the pitter that we use, though.

IMG_2369

5. Wash the spinach (and possibly cut into smaller pieces, depending on what size they are. I like to make sure each piece will fit on a fork with some of the other veggies) and add it to the salad with Feta cheese (to taste).

IMG_2370

Our salad is usually a lot bigger with the extra 1-2 tomatoes and more spinach, but I was trying to use up the veggies that we’d had left over from the week.

The dressing: what my family calls Sauce Vinegrette (We’re of a French background). I have never measured my ingredients, as it’s always been to taste and by sight. I was raised eating and making this dressing, so it’s like second nature to me. Though in these pictures my husband is making it (I taught him years ago, so he’s still getting practice).

Ingredients:

IMG_2375

– Salt
– Pepper
– Apple Cider vinegar
– Extra virgin olive oil
– 1 clove of garlic
– Parsley

1. In a bowl, shake in a healthy amount of salt (it’s pictured above, but it’s difficult to see against the white bowl).

2. Pour vinegar over salt. (Put in enough to dissolve the salt).

IMG_2378

3. Mix with a fork. Add more vinegar if the salt isn’t dissolving.

IMG_2379

4. Add pepper and mix with fork.

IMG_2380

5. Add chopped parsley.

IMG_2381

6. Add minced garlic.

IMG_2382

7. Stir and mix in olive oil.

IMG_2383

8. Stir until it looks like the picture or all the ingredients are completely mixed.

IMG_2384 IMG_2386

9. Pour it over salad.

IMG_2387

10. Toss and serve.

IMG_2388

The salad can be trial-and-error. Sometimes it might turn out a little vinegary. Taste it before you put it on the salad. If it is overwhelmingly vinegary, then put more olive oil and mix it.

I hope you enjoy it if you’ve tried it!

Thank you for reading!